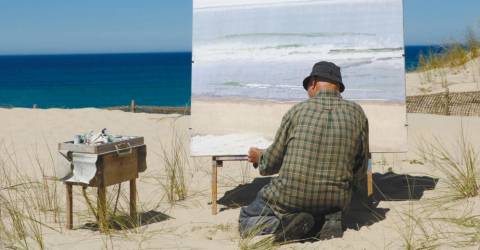
Plein air painting is about leaving the four walls of your studio behind and experiencing painting and drawing in the landscape
Imagine a green lush park with delicate branches reaching into the sky, where the sunlight shines through the leaves, peaking yellows and oranges through, making the greens look golden. You think to yourself: “Man, I can sit here forever.” Perhaps, it might even inspire you to paint.
‘En plein air’, which means outdoors in French, or plein air painting, is the act of painting outdoors. The size of plein air paintings is small, usually ranging from 6 x 8 inches to 12 x 16 inches. This is because you need to work fast before the light completely changes or goes out.
If you’ve ever gotten inspired to paint scenery outdoors and found yourself a subject, go ahead and plop your easel down and start.
The first step is to lay out the colours on your palette. Usually, the basic colours to start a drawing with a natural subject are white, yellow, ultramarine, magenta, teal, red, and reddish-brown oil paints.
You can get most colours you need by mixing the colours together. To desaturate a colour, mix it with its opposite colour. For example, the opposite of ultramarine is reddish-brown.
Usually, it isn’t recommended to use blacks directly as it will look too harsh for a natural painting. Usually, mixing ultramarine and reddish-brown will make a dark enough colour to use as shadows.
The main advantages of oil paints are their flexibility and depth of colour. They can be applied in many different ways, from thin glazes diluted with turpentine to dense thick impasto. Since oil paints dry slower, artists can continue working the paint for much longer than other types of paint.
After laying out the colours, you can start sketching out the major lines of the composition and break them up into zones. For painting, you have the artistic license to change parts of the view in your painting and it’s recommended to use an angled brush, which is a brush with a sharp edge to sketch out the painting.
For example, if you think moving the bridge a little closer to the left would make the painting look more harmonious, feel free to change the composition if necessary.
By starting the painting from the subject that is farthest away, you can start building the colour palette by incorporating the colour into the rest of the painting to tie the whole thing together.
Since plein air painting is more about the whole picture on a smaller canvas, you need not be concerned with the details. As long as you get the approximate colour and draw on textures to indicate the subject, you can move on to the next subject in view.
As you paint subjects that are getting closer in view, the colour palette is changing. Tonally, they’re getting darker and will require more saturation. This is because distance affects the spreading of light and decreases the intensity of the colour.
This will allow the painting to have a better sense of depth and look more realistic. When you want to start putting highlights, which are the brighter or more reflective areas, you add just a tiny amount of yellow.
However, when adding yellow, orange, and reds, always make sure to use them lightly so as to get a more accurate atmospheric perspective.
The reason is that these colours have longer wavelengths and don’t travel so well through the atmosphere. This is why greens in the distant shift towards a bluer colour.
As you paint toward the subject that is closer, you add a little more yellow little by little to communicate the distance. Start with the darkest tone first and slowly add the highlights after.
By using three or four different brushes, you can alternate between colours and tones simultaneously here, as well as allow you to communicate the different folds.
Usually, the common brushes to use are round brushes, flat brushes, and bright brushes.
Round brushes have a pointed tip brush which is great for details. Flat brushes have straight edge bristles and are used to paint quickly and evenly. Bright brushes are the sisters of the flat brush, but have shorter bristles, to hold their stiff shape.
After getting most of the areas painted, it’s time to go over the details with a small round brush. By applying details on subjects that are closer, it also helps to communicate the distance and which subject is closer.
When painting, make sure you have a softer hand, and refine along the way. By starting loose, you can paint faster and cover more area, leaving the details toward the end.
After putting in all the details, you’re done and can now enjoy a painting with a subject that inspired you after getting some fresh air on a nice day outside.
Today, plein air painting is a flourishing trend in the art world. Artists come together for “paint out” excursions, workshops devoted to the practice are held all year-round, and landscape painters are finding that plein air painting is a rewarding experience.
Blending plein air paintings with real life makes for stunning social media postings. – Pinterest